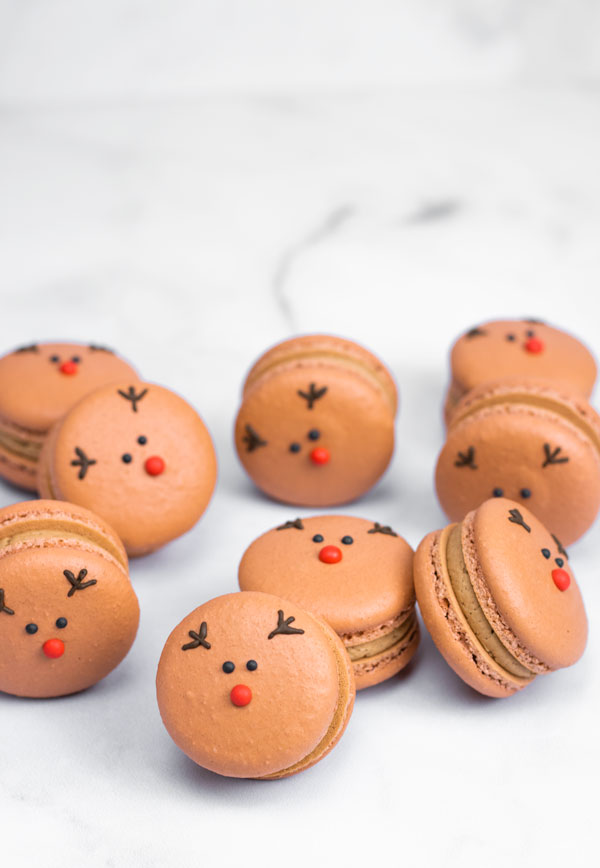
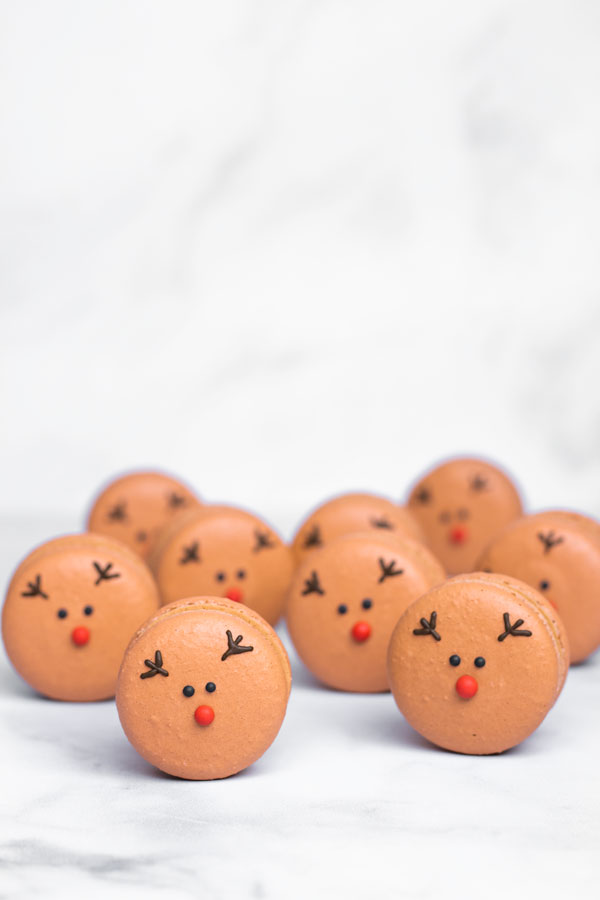
These adorable reindeer macarons are filled with chocolate buttercream and decorated with royal icing. Make them for your next holiday party! If you’re looking for more holiday macarons, try my Snowman Macarons, Candy Cane Macarons, or Gingerbread Macarons.

This post contains affiliate links. As an Amazon Associate I earn from qualifying purchases.
How to Make Reindeer Macarons
These reindeer macarons are perfect even for beginner macaron bakers because they are simple round macaron shells, no templates or shapes involved!
- Bake the macaron shells – The macaron shells are made using the french meringue method, which consists of whisking egg whites and granulated sugar until you have a stiff meringue. This method is perfect for beginners. Detailed step-by-step instructions are included in the recipe card below.
- Prepare the royal icing – Using my small batch royal icing recipe which you’ll find below, prepare the royal icing, divide it into three small bowls and add gel food coloring to each bowl.
- Add the decorations – One of the easiest ways to add royal icing decorations to macarons is to use food coloring markers as a guide. You can just mark where you’ll be adding the royal icing and then decorate. Let the royal icing dry for at least an hour before filling macarons.
- Prepare buttercream and fill macarons – Once macarons are filled, refrigerate overnight so they can mature.
Food Coloring Markers
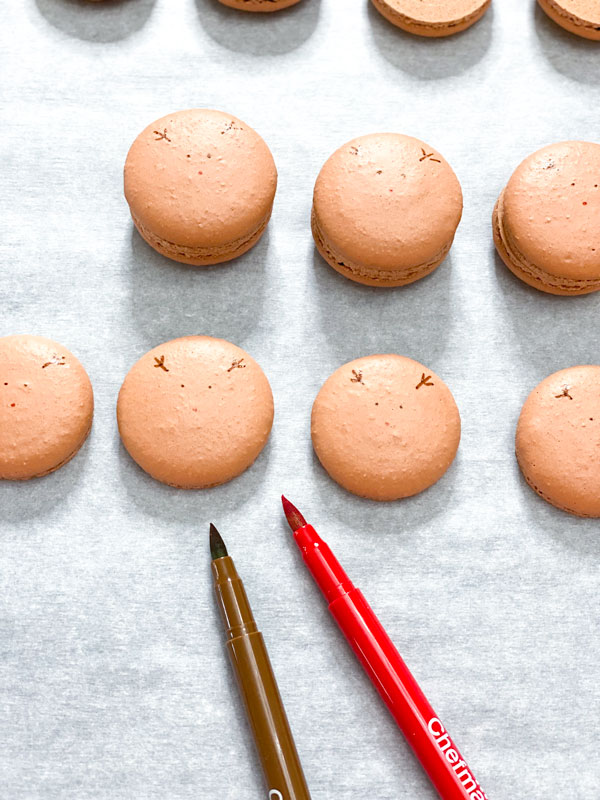
Food coloring markers are markers that are filled with edible food coloring. They are great when decorating character macarons, especially faces, because you can mark the macaron shells and use the markings as a guide.
How to Use Food Coloring Markers
You can use food coloring markers just as you would use regular markers. It’s such a great little trick when decorating macarons with royal icing, so you know exactly where to place the icing.
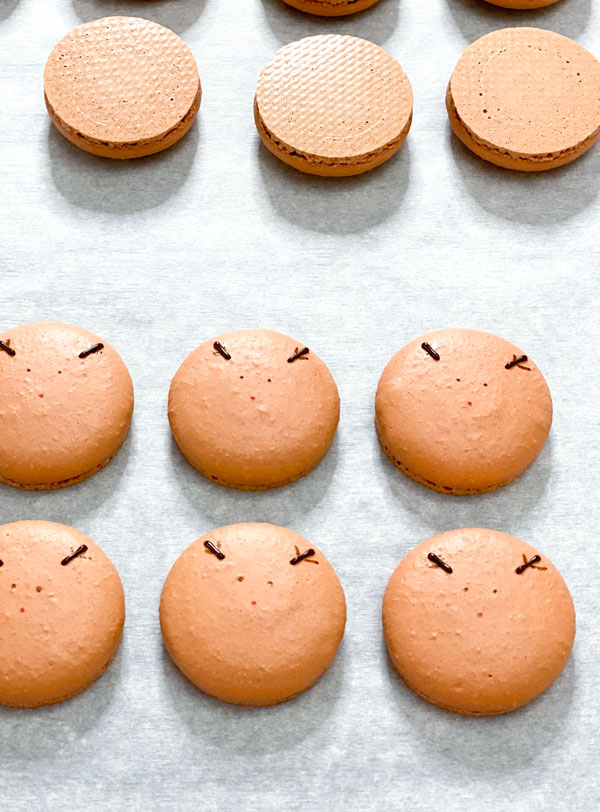
The markers dry very quickly and you can then start to pipe the royal icing, right on top of the markings, as I’ve done below.
Decorating Macarons with Royal Icing
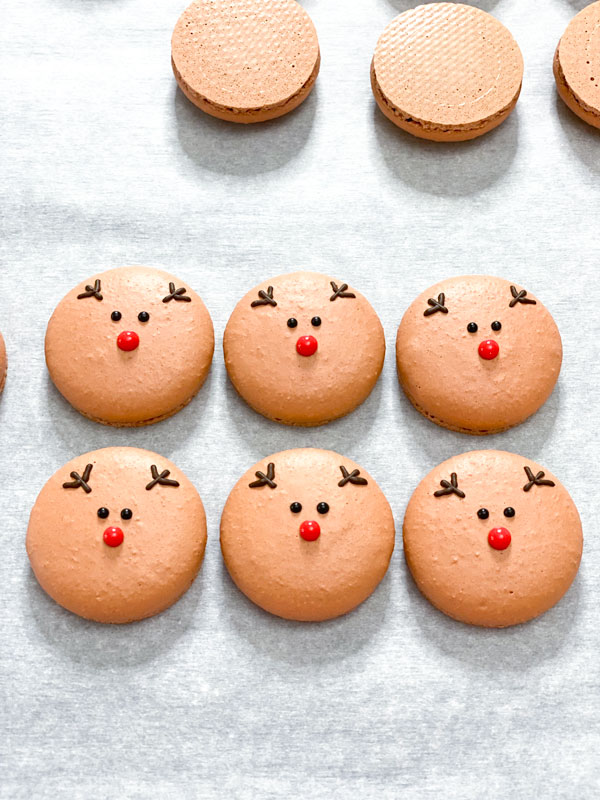
Using royal icing is one of my favorite ways to decorate macarons. It’s very easy to add either a drizzle like I did with my Chocolate Strawberry Macarons or eyes and a nose, like I’ve done here. It’s also a great way to add sprinkles after baking like I’ve done with my Dulce de Leche Macarons.
Royal Icing Tips
- For an easy and quick royal icing, use meringue powder instead of egg whites.
- Make sure the icing consistency is just right so that the royal icing isn’t too runny or too stiff. I used a 20 second icing for these decorations, which means when you mix the icing and lift the spoon, the icing should sink back into itself within 20 seconds.
- Black royal icing usually needs a bit more food coloring than other colors. If your icing looks a bit gray, let the color develop for about 30 minutes, and if it’s still not dark enough, add another drop.
Royal Icing with Meringue Powder
I make my royal icing with meringue powder. It’s very quick and easy, and you can store it in an airtight container at room temperature for up to 2 weeks.
- Powdered Sugar – No need to sift unless your sugar is clumpy
- Meringue powder – Use instead of egg whites for an easier royal icing
- Water – should be at room temperature
Combine the powdered sugar, meringue powder, and a bit of water and stir with a spoon. Continue adding water, a few drops at a time, while checking the consistency. (TIP: if you add too much water by mistake and your icing looks runny, just add a bit more powdered sugar until the consistency is just right.)
Macaron Troubleshooting
Macarons can be very temperamental cookies. Below is a list of very common issues when baking macarons.
Hollow Macarons
One of the main reasons why your shells may be hollow is because your oven temperature is not high enough. If the temperature is too low, the inside of the macaron doesn’t have enough time to bake and will not get full and fluffy. Sometimes just a few degrees will make all the difference. For example, if you’re baking at 300F, try increasing the temperature to 315F and see if the fullness of the shells improves.
Cracked Macarons
Macarons may crack because they weren’t rested long enough. The batter needs to rest after piping so that the shells develop a skin. If the batter hasn’t dried enough when they go in the oven, the shells may crack. Make sure that the shells are completely dry before baking. You can test the batter by lightly touching it and if it’s sticky, they’re not ready to bake.
Lopsided Macarons
Lopsided macarons usually happen because of improper piping. If the shells are unevenly piped, they may not rise evenly. Make sure that you’re holding the piping bag at a 90 degree angle directly on top of where you’re piping the shell.
Macarons Sticking to Silicone Mat
If your macarons are looking great right out of the oven, but are sticking to the silicone mat when you try to remove them, even after they’ve cooled for 15 to 20 minutes, they may be under baked, even if you think you’re baking at the correct temperature. Oven displays are not always accurate, so it is very important to use an oven thermometer to make sure that you’re baking at the correct temperature.
More holiday macarons to try
- Candy Cane Macarons
- Snowman Macarons
- Gingerbread Macarons
- Pumpkin Cheesecake Macarons
- Pumpkin Spice Macarons
- Caramel Apple Macarons
- Salted Caramel Macarons
Macaron resources
Reindeer Macarons
Equipment
- Kitchen scale
- Strainer
- Whisk
- Stand mixer
- Two spatulas
- One 16 inch pastry bag
- Four 8 inch pastry bags
- Round piping tip (I used the Ateco 10)
- Two silicone mats
- Two half sheet pans
- Oven thermometer
- Three small glass bowls (to mix royal icing)
- Food coloring markers (optional)
Ingredients
- 90 grams powdered sugar
- 80 grams almond flour
- 70 grams egg whites (room temperature)
- 70 grams granulated sugar
- 2 grams egg white powder (optional)
- ½ tsp vanilla extract
- 4 drops brown gel food coloring
Chocolate buttercream
- ¼ cup salted butter (½ stick)
- 1 cup powdered sugar
- 1 tsp heavy whipping cream
- ½ tsp cocoa powder
Royal icing
- ½ cup powdered sugar
- ½ tsp meringue powder
- ½ tsp water (room temperature)
- 1 drop brown gel food coloring
- 1 drop red gel food coloring
- 2 drops black gel food coloring
Instructions
Prepare dry ingredients
- Sift powdered sugar and almond flour using a whisk to break down any clumps. Set aside.
- Line sheet pans with the silicone mats.
- Insert the piping tip into the 16 inch pastry bag.
Make the meringue
- Whisk the egg whites on medium speed (speed 4) until you see small bubbles (this can take as little as 15 seconds sometimes).
- Slowly add 3 tbsp of granulated sugar, 1 tbsp at a time, waiting about 10 seconds between each tbsp.
- Whisk until you start to see tracks in the meringue.
- Increase speed to 6 and continue slowly adding the remainder of the granulated sugar, 1 tbsp at a time, until you’ve added all the sugar.
- Once you have soft peaks, stop the mixer, scrape the sides and add the vanilla extract and the brown gel food coloring.
- Whisk for about 5 more minutes, or until you have stiff peaks.
Combine ingredients
- Add in the powdered sugar and almond flour mixture in three parts, 1/3 at a time, folding each part until fully combined.
- Once the meringue and dry ingredients are fully combined, stop folding.
- Now you need to deflate some of the air in the batter by taking the spatula and smearing the batter on the sides of the bowl two or three times, and then folding once or twice.
- Repeat the process of smearing some of the batter on the side of the bowl and folding until the batter looks smooth and glossy and runs down the spatula slowly in ribbons.
- You can test the consistency by lifting the spatula and letting the batter run down. If it falls in ribbons and sinks back into itself within 30 seconds, the batter is ready.
- Transfer the batter to the 16 inch pastry bag.
Pipe the macarons
- Take the pastry bag and, holding the bag at a 90° angle, pipe the shells in 3/4 inch circles.
- Tap the tray against the counter a few times to pop any air bubbles. I usually tap about 7-8 times.
- Let the macarons rest until they form a skin and are no longer sticky.
- While the macarons are resting, preheat the oven to 315°F.
- Bake the macarons for 14-16 minutes.
- Macarons are ready when they no longer shift if you touch the tops.
- Let the macaron shells cool for at least 30 minutes before decorating.
Make the royal icing
- In a small bowl, combine the powdered sugar, meringue powder, and a few drops of water and stir with a spoon.
- Continue stirring adding a few more drops of water if necessary.
- Check the consistency by lifting the spoon and counting how many seconds it takes for the icing to sink back into itself. If it takes around 20 seconds, it's ready.
- Separate the icing into 3 parts. Add 1 drop of red to one of the bowls, 2 drops of black to one of the other bowls, and 1 drop of brown to the last bowl.
- Transfer the royal icing to separate 8 inch piping bags, and cut a very small opening at the tip of each one.
Decorate the macarons
- If using the food coloring markers, mark the macarons where you'll be placing the royal icing for the antlers, eyes, and nose.
- Add the royal icing where you've marked with the markers.
- Let the royal icing dry for about an hour before filling the macarons.
Chocolate buttercream
- In a medium bowl, using the stand mixer, whisk the butter until smooth.
- Add half of the powdered sugar and whisk until fully combined.
- Add the remaining powdered sugar and whisk until combined.
- Add the heavy cream and the cocoa powder and mix until creamy and smooth.
Assemble the macarons
- Fill an 8 inch pastry bag with the buttercream and cut a ¼ inch opening at the tip of the bag.
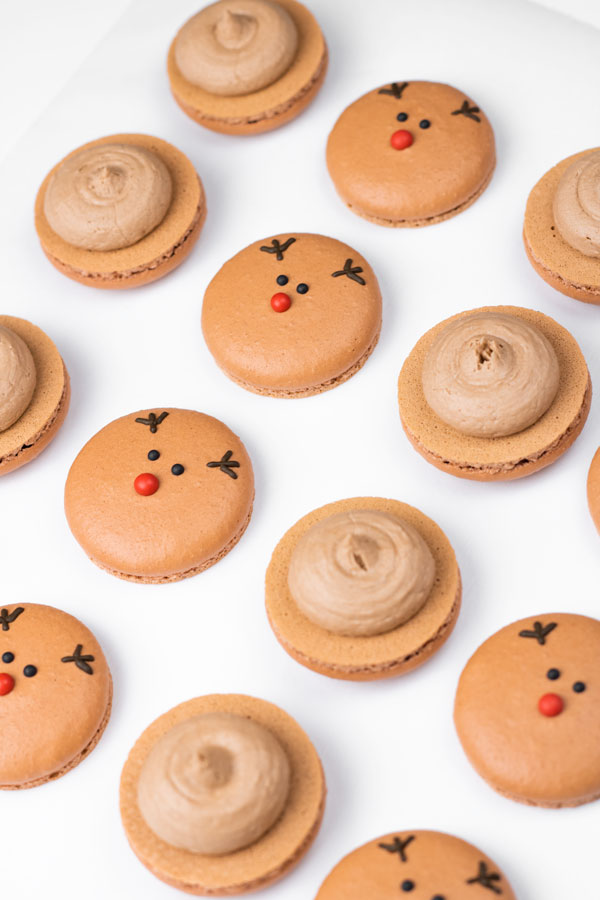
- Pipe the buttercream in the center of the bottom shells.
- Top the filled macaron shells with the decorated shells and refrigerate for at least 24 hours so that the macarons can mature.
- When ready to eat, remove the macarons from the refrigerator and let them come to room temperature at least 20 to 30 minutes before eating.


This looks so good! What a great treat to make with kids!
They really are! Hope you enjoy them!
Thanks for sharing! Do they keep long?
You’re so welcome! You can keep them in an airtight container in the refrigerator for a week or freeze for about 2 months.